A little goodie to share with you today as I was playing with my copic airbrush system....A card like this would take forever with ink and a sponge, one of the MANY reasons that I {{{{heart}}}} my airbrush. The image and sentiment are from MFT's "Inspired by the Wild, Wild, West"!
I have included a step by step tutorial.....but you know what is even better? Trying this out for yourself in a workshop! Airbrushing is one of the many things we do in the Color and Ink Workshop...I get to walk you through creating scenes such as this one :)
There are 2 Workshops open in Canada right now....they are the ONLY 2 being offered in Canada this year....so grab your Courage....saddle up...and I hope to see you there! HERE is the link to the applications :)
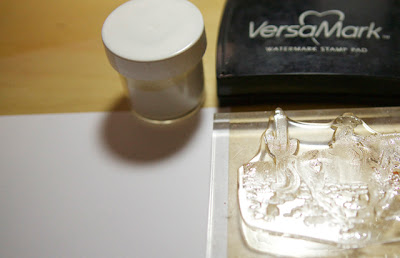
First off I ink up my image in Versamark ink and heat emboss it with white embossing powder on X-press it Blending Card stock.
I give a light dusting to the sky as a base with YR31 (no masking needed).
I use one of my Circle STAX to cut out a sun shape the appropriate size for my image.
I place it with repositionable adhesive and then go in with a darker yellow and concentrate my color around the sun.
Again, darker around the sun and I sprayed a ground base with E31.
Keep deepening your color as you see fit.
I wanted this to be a sunset image so I went in with some YR18 and added more E37 to the ground.
Now, to reveal my white embossed image. To take the main part of the ink off the embossing....spray a rag with copic blender solution and wipe only the image. I go in after I have done that with my blender pen and clean up the little areas I may have missed. You want the white to stand out so it needs to be nice and clean.
As a last little detail I went in with my blender pen and created some clouds. Very easy to do....if you are unsure try the technique on some scratch paper first.I have included a step by step tutorial.....but you know what is even better? Trying this out for yourself in a workshop! Airbrushing is one of the many things we do in the Color and Ink Workshop...I get to walk you through creating scenes such as this one :)
There are 2 Workshops open in Canada right now....they are the ONLY 2 being offered in Canada this year....so grab your Courage....saddle up...and I hope to see you there! HERE is the link to the applications :)
First off I ink up my image in Versamark ink and heat emboss it with white embossing powder on X-press it Blending Card stock.
I give a light dusting to the sky as a base with YR31 (no masking needed).
I use one of my Circle STAX to cut out a sun shape the appropriate size for my image.
I place it with repositionable adhesive and then go in with a darker yellow and concentrate my color around the sun.
Again, darker around the sun and I sprayed a ground base with E31.
Keep deepening your color as you see fit.
I wanted this to be a sunset image so I went in with some YR18 and added more E37 to the ground.
Now, to reveal my white embossed image. To take the main part of the ink off the embossing....spray a rag with copic blender solution and wipe only the image. I go in after I have done that with my blender pen and clean up the little areas I may have missed. You want the white to stand out so it needs to be nice and clean.
That's it for today....I am looking forward to coming to Calgary in May....you folks were the inspiration behind today's post!


1 comment:
Fabulous tutorial Sherrie! TFS
Post a Comment