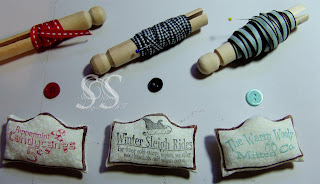
 You may have noticed how I have totally caught the sewing bug and LOVE to get more mileage out of my fabulous stamps by stamping on fabric! Here is a little tutorial with step by step for these darling little ornaments. You can click on any of the photos to view them larger!
 First of all the ink to use....I use either a good pigment ink (colorbox will work) or I also have these fabulous metallic inks by Palette. If you are to buy these metallic ink pads MAKE SURE to buy the reinkers too, you will need them. I stamped the frame to the signs in buff bronze metallic ink.
 Next I stamped the inside of the sign with a contrasting color (Crimson).
 As you can see, I stamped a few of them at one time and will cut them out later. Leave enough room below your image because you will be folding your fabric in half to sew.
 Heat set the ink with your iron. I use a piece of copy paper over my images so that I don't get ink on my iron....wouldn't look that great on hubby's white shirts....lol!
 Fold fabric in half, with your right side to the inside. The folded edge will not be stitched so make sure it is straight and your image will be centered after stitching.
 Stitch around the edge of the sign, use the border of your sign as your guide. Leave a small centered opening at the top, this is where you will turn your fabric right side out and stuff.
 Turn your ornaments right side out and stuff with fill. I just opened an old pillow that I could "steal" some stuffing from. I also use my stylus to help me stuff them and get right into the corners.
 The fun part! Picking out ribbon and coordinating buttons! I chose petite ribbons as my ornaments are petite. Hold a loop of ribbon to the front of your ornament and hand stitch the button on. This will do two things, close the top and add the loop to hang them.
You are done! Easy peasy! Now you could add these to gifts, hang them on door knobs or decorate your tree, wreath or swags with them!
Enjoy!

5 comments:
These are so wonderful, Sherrie!! Thanks for your awesome tutorial!!
Oh, Sherrie--these are great! You hit a home run, as usual!
AWESOME, Sherrie!!! Definitely going to try out this technique! Thanks for sharing, friend!!
Thanks for another great tutorial! I really need to give this a try!
very creative and neat, thanks for sharing
Post a Comment